728x90
💡 진행 중인 프로젝트에서 다른 api 서버와 통신이 필요했다. 여러 선택지 중에 Spring RestTemplate를 사용하는 것으로 결정되었기 때문에 이를 공부하고 나중에도 참고하여 사용할 수 있도록 정리해 보았다. 이 글에서는 외부 api 서버와의 통신 기술 중 restTemplate를 선택한 과정과 그 이유를 이야기하고, 누구나 참고하여 본인의 코드에 적용할 수 있도록 예시 코드를 작성하려고 한다.
RestTemplate
- RestTemplate은 Spring 3.0부터 제공되어 왔던 동기식 HTTP 클라이언트로, RESTful 서비스를 호출할 때 많이 사용된다.
🙂 장점
- 사용하기 쉽고 코드가 직관적이다.
- HTTP 메서드(GET, POST 등)에 대한 다양한 메서드를 제공한다.
- 가장 무난한 방법으로 이미 인터넷에 수많은 블로그 글이 있어 쉽게 구현 가능하다.
🙃 단점
- 2020년 이후로 deprecated 되었으며 대신 WebClient를 사용하는 것이 권장되고 있다.
- 여기서 deprecated 되었다는 표현은 곧 제거될 것이라는 의미보다는 더 이상 큰 업데이트가 이루어지지 않고 유지 관리된다는 뜻으로 보인다.
- 이어서 RestTemplate보다는 WebClient 사용을 권고하고 있다.
- 스프링 공식 문서(current, 23.8.27 기준)에 보면 NOTE: As of 5.0 this class is in maintenance mode, with only minor requests for changes and bugs to be accepted going forward. Please, consider using the org.springframework.web.reactive.client.WebClient which has a more modern API and supports sync, async, and streaming scenarios.라는 문장이 있다.
- 비동기 호출을 지원하지 않는다.
- 비동기 호출을 위한 AsyncRestTemplate가 따로 있다고 한다.
- OpenFeign에 비해서는 코드가 복잡한 편이다. 릴레이 서버 전용으로 구현하는 것이 아니라, 일반적인 서버에 붙이는 거라면 코드의 간결함을 위해 OpenFeign을 선택하는 것이 나을 수도 있다.
🤔 WebClient 대신 RestTemplate를 사용한 이유
- 현재 진행중인 프로젝트는 대규모 요청이 들어오는 것을 대비해야 할 정도로 규모가 크지 않아 비동기/넌블로킹 호출이 불필요하다고 판단했다.
- Depreacated 되었다고는 하나, 사라지는 기능은 아니었고 유지보수 측면에서 관리되고 있는 기능이었기 때문에 비동기/넌블로킹 호출이 필요한 것이 아니라면 RestTemplate를 고려하는 것이 합리적인 것 같았다.
- 내가 개발하고 있는 서버는 Spring MVC 기반의 전통적인 멀티 스레드 기반의 웹 프레임워크이다. 여기에 WebFlux를 붙이게 되면 신경 써야 할 부분이 굉장히 많았다.
- 프로젝트 기간이 짧았기 때문에 학습 곡선이 존재하는 WebFlux의 경우, 팀원들 모두가 경험이 없는 상태에서 무리하게 도입하기에는 큰 메리트가 없었다.
🤖 두 프레임워크를 동시에 사용하는 경우에 대한 뤼튼의 답변
- 서블릿 API 의존성: Spring MVC는 서블릿 API에 의존적이며, 이는 기본적으로 블로킹 I/O와 스레드당 요청 모델을 사용합니다. 반면에, Spring WebFlux는 리액티브 스트림을 지원하며, 비동기 및 논블로킹 I/O를 활용합니다.
- 스레드 모델 차이: Spring MVC와 Spring WebFlux의 스레드 모델은 매우 다릅니다. 따라서 두 프레임워크를 혼합하여 사용하면 성능과 효율성 측면에서 복잡한 문제가 발생할 수 있습니다.
- 설정 복잡성: 두 프레임워크를 동시에 사용하게 되면 설정 복잡성이 증가합니다. 어떤 요청은 MVC 컨트롤러로, 어떤 요청은 WebFlux 핸들러로 라우팅해야 하는지 결정해야 하며, 이것은 애플리케이션의 복잡도를 증가시킵니다.
- 결론 : 일반적으로 하나의 애플리케이션 내에서 Spring MVC와 Spring WebFlux를 혼합하여 사용하는 것보다는 한 가지 웹 프로그래밍 모델을 선택하는 것이 좋습니다.
📜 아래는 내가 참고한 블로그이다. 하나의 프로젝트에 두 의존성을 모두 추가하는 경우에 대해 기술하고 있다.
[Spring] WebMVC와 WebFlux 의존성이 모두 존재하는 경우의 동작 방식 by 망나니개발자
[Spring] WebMVC에서 WebFlux 사용 (with WebClient) by moonsiri
읽어보고 잘 판단하면 될 것 같다.
📌 구현해보기
📦 일반적인 서버
일반적인 스프링 MVC 기반의 컨트롤러 <-> 서비스 <-> 레파지토리 <-> 데이터베이스로 이어지는 로직이다.
⌨️ Dto
public class Dto {
    @Getter
    public static class Post {
        private String name;
        private int age;
        private String team;
        private int overall;
    }

    @Builder
    @Getter
    public static class Response {

        private String name;
        private String team;
        private int overall;
        private String scoutStatus;
        private int point;
    }
}- 요청 데이터는 선수 이름과 나이, 소속팀, 오버롤이다. 이를 이용하여 해당 선수의 스카우트 점수를 매겨 스카우트 리스트에 넣을지 말지를 정한다.
- 응답은 선수 이름, 소속팀, 오버롤, 스카우트 상태, 포인트(스카우트 점수)이다.(별 의미는 없다)
⌨️ Entity
@Entity
@NoArgsConstructor(access = AccessLevel.PROTECTED)
public class Player {

    @GeneratedValue(strategy = GenerationType.IDENTITY)
    @Id
    private Long id;

    private String name;

    private int age;

    private String team;

    private int overall;

    private Player(String name, int age, String team, int overall) {
        this.name = name;
        this.age = age;
        this.team = team;
        this.overall = overall;
    }

    public static Player addPlayer(String name, int age, String team, int overall) {

        return new Player(name, age, team, overall);
    }
}- Player Entity로 스카우트 리스트에 해당한다.
- 데이터베이스에 선수의 이름, 나이, 현재 팀명, 오버롤을 기록한다.
⌨️ Controller
@RestController
@RequiredArgsConstructor
@RequestMapping
public class Controller {

    private final ServerService serverService;

    @PostMapping("/players")
    public ResponseEntity checkMember(@RequestBody Dto.Post post) throws JsonProcessingException {

        Dto.Response response = serverService.check(post);

        return new ResponseEntity<>(response, HttpStatus.OK);
    }
}- dto로 받은 객체를 서비스 클래스에 넘겨 비즈니스 로직을 처리하고, 응답값을 다시 dto 객체로 변환하여 리턴한다.
⌨️ Service(oneServerServiceImplement)
@Service
@RequiredArgsConstructor
public class oneServerServiceImplement implements ServerService {

    private final ScoutListRepository scoutListRepository;

    public Dto.Response check(Dto.Post post) {

        int playerAge = post.getAge();
        int playerOverall = post.getOverall();
        int point = 0;

        if (playerAge >= 35) {
            point -= 3;
        } else if (playerAge >= 32) {
            point -= 2;
        } else if (playerAge >= 30) {
            point -= 1;
        } else if (playerAge >= 27) {
            point += 1;
        } else if (playerAge >= 24) {
            point += 2;
        } else {
            point += 3;
        }

        if (playerOverall >= 95) {
            point += 10;
        } else if (playerOverall >= 90) {
            point += 7;
        } else if (playerOverall >= 87) {
            point += 5;
        } else if (playerOverall >= 85) {
            point += 3;
        } else if (playerOverall >= 83) {
            point += 1;
        } else {
            point -= 5;
        }

        if (point >= 3) {
            Player addedPlayer = Player.addPlayer(post.getName(), playerAge, post.getTeam(), playerOverall);

            Player savedPlayer = scoutListRepository.save(addedPlayer);
            return Dto.Response.builder()
                               .name(savedPlayer.getName())
                               .point(point)
                               .scoutStatus("interested")
                               .team(savedPlayer.getTeam())
                               .overall(savedPlayer.getOverall())
                               .build();
        }

        return Dto.Response.builder()
                .name(post.getName())
                .point(point)
                .scoutStatus("Not interested")
                .team(post.getTeam())
                .overall(playerOverall)
                .build();
}- 해당 선수의 나이와 오버롤을 특정 기준으로 평가하여 포인트를 부여한다. 합산 포인트 3점 이상이면 스카우트 리스트에 등록하고(데이터베이스에 저장), 관심이 있다고 응답한다. 그렇지 않은 경우에는 해당 선수에 관심이 없다고 응답을 보낸다.
- 한마디로 이 서버는 선수를 평가하고 적합한 선수라면 스카우트 리스트에 등록하는 기능을 한다.
⌨️ H2

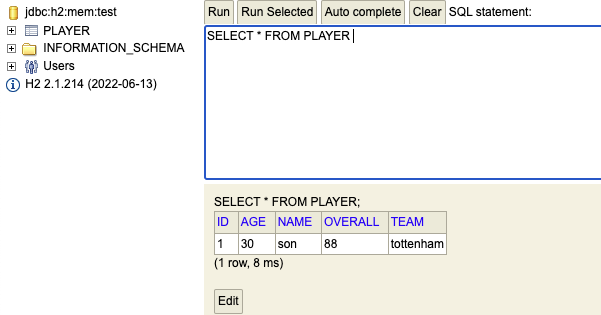
- 해당 서버는 h2 서버와 연결되어 있다.
📭 Postman

- "son" 선수를 스카우트 평가 서버에 보냈더니 스카우트 리스트에 등록되었다는 응답을 받았다.
📜 결과
- 스카우트 리스트에도 잘 들어갔다.
- 이 서버는 RestTemplate와 비교하기 위해 만든 것이다.
- 이제 서버에 RestTemplate를 적용해 보자.
- 현재는 Postman으로부터 들어온 요청이 Controller -> Service -> Repository -> H2 Database -> Repository -> Service -> Controller로 다시 응답하는 방식이다.
- 이를 Contoller -> Service -> api server -> Service -> Controller로 변경해 보겠다.
- api server는 mysql을 db로 사용하는 서버로 따로 만들었다. 여기서는 보여주지 않는다.
📌 RestTemplate 적용하기
⌨️ Build.gradle
    implementation 'org.apache.httpcomponents:httpclient:4.5.14' // apache httpClient
    implementation 'org.springframework.retry:spring-retry:1.3.4' // spring retry
    implementation group: 'org.json', name: 'json', version: '20231013' // json 데이터 변환용
⌨️ RestTemplateConfiguration
@EnableRetry
@Configuration
public class RestTemplateConfig {

    @Bean
    HttpClient httpClient() {
    	// (1)
        return HttpClientBuilder.create()
                .setMaxConnTotal(100)
                .setMaxConnPerRoute(5)
                .build();
    }

    @Bean
    RestTemplate restTemplate(HttpClient httpClient, RestTemplateBuilder builder) {
        // (2)
        HttpComponentsClientHttpRequestFactory httpComponentsClientHttpRequestFactory = new HttpComponentsClientHttpRequestFactory();
        httpComponentsClientHttpRequestFactory.setHttpClient(httpClient);

        // (3)
        BufferingClientHttpRequestFactory bufferingClientHttpRequestFactory = new BufferingClientHttpRequestFactory(
                httpComponentsClientHttpRequestFactory);

        // (4)
        RestTemplate restTemplate = new RestTemplate(bufferingClientHttpRequestFactory) {
            @Override
            @Retryable(value = RestClientException.class, maxAttempts = 2, backoff = @Backoff(delay = 1000))
            public <T> ResponseEntity<T> exchange(URI url, HttpMethod method, HttpEntity<?> requestEntity,
                                                  Class<T> responseType) throws RestClientException {

                return super.exchange(url, method, requestEntity, responseType);
            }

            // (5)
            @Recover
            public <T> ResponseEntity<String> exchangeRecover(RestClientException e) {
                return  ResponseEntity.badRequest().body("### 2회의 요청을 전부 실패했습니다.");
            }
        };

        // (6)
        return builder
                .requestFactory(() -> bufferingClientHttpRequestFactory)
                .setConnectTimeout(Duration.ofMillis(3000))
                .setReadTimeout(Duration.ofMillis(5000))
                .interceptors(new HttpClientInterceptor())
                .build();
    }
}- RestTemplate를 사용하기 위해 구성한 Configuration이다.
- (1) RestTemplate는 Connection Pooling을 지원하지 않는다.
- RestTemplate는 호출할 때마다 임시 TCP 소켓을 개방하여 사용하는데 이 소켓은 사용이 끝나면 TIME_WAIT 상태가 된다.
- TIME_WAIT 상태의 포트는 일정 시간 동안 재사용할 수 없게 되는데 많은 양의 요청이 발생하면 TIME_WAIT 상태의 포트가 늘어나게 되고 이는 결국 새로운 연결을 위해 사용해야 하는 포트의 부족으로 이어지게 된다.
- 이밖에도 성능 저하와 리소스 낭비 등으로 Connection Pooling을 추가하는 것이 좋은데 (1)의 httpClient가 해당 기능이다.
- import org.apache.http.client.HttpClient; import org.apache.http.impl.client.HttpClientBuilder;와 같이 apache의 httpClient가 필요하다.
- Okhttp에도 있다고는 하는데, 나는 httpClient를 사용했다. 딱히 이유는 없다.
- .setMaxConnTotal(100) : 클라이언트가 풀링 하는 HTTP 연결의 최대 수를 설정한다.
- .setMaxConnPerRoute(5) : 하나의 라우트(특정 호스트로 가는 경로)에 대해 생성될 수 있는 동시 연결 수의 최대치를 설정한다.
- 예를 들어, www.example.com와 www.anotherexample.com으로 요청을 보내는 경우 각각 다른 라우트로 간주되며 각각에 대해 별도로 제한이 적용된다.
- (2) httpClient의 ConnectionPool을 사용하기 위해서는 RestTemplate 객체를 생성할 때 ClientHttpRequestFactory의 객체를 사용해야 한다.
- .setHttpClient(httpClient); 위에서 적용한 httpClient를 세팅하여 Connection Pooling을 추가한다.
- (3) 여기서 ClientHttpRequestFactory의 객체를 BufferingClientHttpRequestFactory 객체의 파라미터로 넣어준다.
- 이렇게 하는 이유는 뒤에 나올 인터셉터가 로깅을 위해 api 서버로부터 받은 응답값의 InputStream을 먼저 읽어야 하는데, 이를 읽고 나면 데이터가 사라져(Stream이 닫힌다.) 응답값을 불러올 수 없게 된다. 이를 막기 위한 것이다.
- BufferingClientHttpRequestFactory는 Stream의 내용을 메모리에 버퍼링 해두기 때문에 여러 번 읽는 것이 가능하다. 이를 통해 인터셉터로 응답에 대한 로그를 남기고 이후에 애플리케이션 응답 결과 역시 정상적으로 얻을 수 있다.
- 만약 BufferingClientHttpRequestFactory를 사용하지 않으면 java.io.IOException: Attempted read from closed stream 에러가 발생한다.
- (4) Spring Retry라는 라이브러리를 이용하여 Http 통신에 주로 사용할 exchange 메서드를 오버라이딩하여 재구성한 것이다.
- Spring Retry는 http 통신이 실패했을 때 재시도를 도와주는 라이브러리이다.
- RestTemplate 객체를 새로 생성하고 클래스에는 @EnableRetry 애너테이션을, exchange 메서드에는 @Retryable(value = RestClientException.class, maxAttempts = 2, backoff = @Backoff(delay = 1000)) 애너테이션을 달아준다.
- Http 통신 요청을 보낼 때 실패할 경우 maxAttempts로 설정한 숫자만큼 재연결을 시도한다.
- maxAttempts의 default 횟수는 3이다.
- @Backoff 애너테이션은 연결 실패 후 재연결 시도까지의 딜레이 시간을 설정하는 것이다.
- exchange의 파라미터는 exchange(보낼 주소, HTTP 메서드, 요청을 보낼 Entity, 응답받을 타입)이다.
- 이외에도 여러 메서드가 있으나, 나의 경우에는 범용적으로 사용가능한 exchange만을 다루었다. 자세한 건 검색😉
- (5) @recover 애너테이션을 사용한 메서드로, retryable 시도 이후에 전부 실패했을 때 실행된다. 나는 따로 사용하지 않았다.
- (6) 마지막으로 restTemplate의 빌더로 값을 세팅해 준다.
- .setConnectTimeout(Duration.ofMillis(3000)) : HTTP 요청을 시작하고 서버와의 TCP 핸드셰이크를 완료하는 데 허용되는 시간을 설정한다.
- .setReadTimeout(Duration.ofMillis(5000)) : HTTP 요청이 서버에 도착한 후, 응답을 받아오는 데 걸리는 시간을 설정한다.
- .interceptors(new HttpClientInterceptor()) : HTTP 요청 및 응답을 로깅하기 위한 인터셉터를 세팅한다.
- 만약 이 시간을 넘어버리게 되면 ReadTimeOut이 발생한다.
⌨️ HTTP 요청과 응답을 위한 Interceptor
@Slf4j
public class HttpClientInterceptor implements ClientHttpRequestInterceptor {

    @Override
    public ClientHttpResponse intercept(HttpRequest request, byte[] body,
                                        ClientHttpRequestExecution execution) throws IOException {
        // 공통 Header 추가
        request.getHeaders().add("Custom-Header", "Custom-Value");

        // Request 정보 로깅
        log.info("-----------------------------------------------------------------------------");
        log.info("<Request>");
        log.info("요청 URI : {}", request.getURI());
        log.info("요청 Method : {}", request.getMethod());
        log.info("요청 Headers : {}", request.getHeaders());
        log.info("요청 Body : {}", new String(body, "UTF-8"));
        log.info("-----------------------------------------------------------------------------");

        // 다음 인터셉터 또는 요청 실행
        ClientHttpResponse response = execution.execute(request, body);

        // Response 정보 로깅
        log.info("<Response>");
        log.info("응답 Status : {}", response.getStatusCode());
        log.info("응답 Headers : {}", response.getHeaders());

        // List 형식 등 복잡한 json body도 모두 읽을 수 있게 출력
        BufferedReader reader = new BufferedReader(new InputStreamReader(response.getBody()));
        StringBuilder sb = new StringBuilder();
        String line;
        while ((line = reader.readLine()) != null) {
            sb.append(line);
        }
        log.info("응답 Body : {}", sb);
        log.info("-----------------------------------------------------------------------------");

        reader.close();
        return response;
    }
}- 크게 어려운 내용이 아니니 간단하게 설명하겠다.
- 응답 body의 경우 List 형식 등으로 응답을 받을 때는 응답 데이터 전부를 출력할 수가 없어 위와 같은 방식을 사용했다.
- 이 부분에서 위에 설명한 내용이 나온다. BufferingClientHttpRequestFactory를 사용하지 않으면 인터셉터에서 로깅을 위해 스트림을 읽어버리기 때문에 이후에 스트림이 닫혀 실제 데이터의 응답값을 가져올 수 없다.
- 실무에서 사용해 보니 api server에서 데이터를 제대로 가져오기 위해 Request Dto를 잘 만드는지, 응답 데이터는 잘 가져오는지를 필수적으로 확인해야 에러에 빠르게 대응할 수 있었다. 따라서 이 interceptor는 필수라고 할 수 있겠다.
⌨️ 테스트를 위해 변경한 Controller
@RestController
@RequiredArgsConstructor
@RequestMapping
public class Controller {

    private final ServerService serverService;

    @PostMapping("/players")
    public ResponseEntity checkPlayer(@RequestBody Dto.Post post) throws JsonProcessingException {

        Dto.Response response = serverService.check(post);

        return new ResponseEntity<>(response, HttpStatus.OK);
    }

    @GetMapping("/list")
    public ResponseEntity getPlayerList() throws IOException {

        List<Dto.Response> list = serverService.getList();

        return new ResponseEntity<>(list, HttpStatus.OK);
    }

    @GetMapping("/players")
    public ResponseEntity getPlayer(@RequestParam("name") String name, @RequestParam("team") String team) throws IOException {

        Dto.Response list = serverService.getPlayer(name, team);

        return new ResponseEntity<>(list, HttpStatus.OK);
    }
}- 가장 많이 사용할 post, get, getAll 메서드만 다뤄보겠다.
- 나머지는 직접 구현해 보면 금방 응용하여 만들 수 있을 것이다.
⌨️ POST 사용 메서드
private final RestTemplate restTemplate;

@Retryable
public Dto.Response check(Dto.Post post) throws JsonProcessingException {

    int playerAge = post.getAge();
    int playerOverall = post.getOverall();
    int point = 0;

    if (playerAge >= 35) {
        point -= 3;
    } else if (playerAge >= 32) {
        point -= 2;
    } else if (playerAge >= 30) {
        point -= 1;
    } else if (playerAge >= 27) {
        point += 1;
    } else if (playerAge >= 24) {
        point += 2;
    } else {
        point += 3;
    }

    if (playerOverall >= 95) {
        point += 10;
    } else if (playerOverall >= 90) {
        point += 7;
    } else if (playerOverall >= 87) {
        point += 5;
    } else if (playerOverall >= 85) {
        point += 3;
    } else if (playerOverall >= 83) {
        point += 1;
    } else {
        point -= 5;
    }

    if (point >= 3) {

        // 해당 http 요청에 추가할 header
        HttpHeaders headers = new HttpHeaders();
        headers.add("Content-Type", "application/json");
        headers.add("Authorization", "Bearer <access_token>");
        headers.add("Add-Header", "Add-Value");

        // body(post), header를 파라미터로 하는 HttpEntity 생성
        HttpEntity<Dto.Post> entity = new HttpEntity<>(post, headers);

        // url, HttpMethod, HttpEntity, responseType을 파라미터로 하여 Http 요청을 보냄
        ResponseEntity<String> responseEntity = restTemplate.exchange("http://localhost:30000/saves", HttpMethod.POST, entity,
                                                                      String.class);

        String response = responseEntity.getBody();

        JsonNode jsonNode = JsonConverter.getJsonNode(response);
        String name = jsonNode.get("name").asText();
        String scoutStatus = jsonNode.get("scoutStatus").asText();
        String team = jsonNode.get("team").asText();
        int overall = jsonNode.get("overall").asInt();

        return Dto.Response.builder()
                           .name(name)
                           .point(point)
                           .scoutStatus(scoutStatus)
                           .team(team)
                           .overall(overall)
                           .build();
    }

    return Dto.Response.builder()
                       .name(post.getName())
                       .point(point)
                       .scoutStatus("Not interested")
                       .team(post.getTeam())
                       .overall(playerOverall)
                       .build();
}- 맨 처음 예시에서는 데이터베이스에 접근하여 저장하는 방식이었지만 해당 역할을 api server에서 하게 되었다.
- 메서드에는 Spring Retry를 사용하기 위해 @Retryable 애너테이션을 추가한다.
- HttpHeader 객체로 개별적인 header를 추가해 주고, 공통인 부분은 인터셉터를 이용하도록 하자.
- HttpEntity의 파라미터로 Dto 객체와 headers를 넣어주고 exchange를 사용하여 post 요청을 보내고 응답을 ResponseEntity 타입으로 받는다.
- 이는 exchange 메서드의 반환 타입이 ResponseEntity이기 때문이다.
- 이후에 getBody() 메서드로 String 형태의 json 응답값을 얻는다.
- 이를 JsonConverter를 이용하여 분해하고 원하는 데이터를 추출하여 응답값에 넣고 리턴한다.
- 여기서는 JsonConverter에 대해 다루지 않겠다. 지금까지만 해도 내용이 워낙 많으므로 추후에 따로 JSON 파싱에 대한 블로깅을 할 생각이다.
📭 postman

- 맨 처음 예시와 다를 게 없다.
📖 log

- 인터셉터를 통해 로그가 남는 모습을 확인할 수 있다.
- 요청 Method는 POST이다.
- 여기서 요청 Body와 응답 Body가 찍히니 테스트 시 깔끔하게 데이터 정상 처리 여부를 확인할 수 있게 되었다.
📖 DB

- 아래의 getAll 테스트를 위해 3 명의 선수 데이터를 더 추가하였다.
⌨️ getAll 전체 조회 메서드
private final RestTemplate restTemplate;

@Override
@Retryable
public List<Dto.Response> getList() throws IOException {


   List<Map<String, Object>> responseMapList = restTemplate.exchange("http://localhost:30000/list",
                                                                                            HttpMethod.GET, null,

                                                                                            new ParameterizedTypeReference<List<Map<String, Object>>>() {}).getBody();

    JSONArray jsonArray = JsonConverter.getJsonArray(responseMapList);

    List<Dto.Response> responseDtoList = new ArrayList<>();

    for (Object response : jsonArray) {
        JsonNode jsonNode = JsonConverter.getJsonNode(String.valueOf(response));
        String name = jsonNode.get("name").asText();
        String scoutStatus = jsonNode.get("scoutStatus").asText();
        String team = jsonNode.get("team").asText();
        int overall = jsonNode.get("overall").asInt();

        Dto.Response responseDto = Dto.Response.builder()
                                         .name(name)
                                         .scoutStatus(scoutStatus)
                                         .team(team)
                                         .overall(overall)
                                         .build();

        responseDtoList.add(responseDto);
    }

    return responseDtoList;
}- get의 경우에는 json body가 없으므로 entity가 들어갈 파라미터 자리에 null을 넣는다.
- 또한 응답값이 json 형태의 list일 것이기 때문에 .getBody()를 바로 사용하여 Map 타입의 리스트로 응답 데이터를 받았다.
- 이후 JsonArray라는 타입으로 컨버팅 하여 for 문으로 돌면서 응답 데이터를 하나씩 파싱 하는 과정을 거친다.
- 여기에서도 마찬가지로 JsonArray에 대해 설명하지 않겠다.
📭 postman

- 스카우트 리스트에 등록된 모든 Player가 정상적으로 조회된다.
📖 log

- 요청 Method가 GET이다.
- 요청 Body는 없고, 응답 Body는 Json 형식의 데이터 리스트로 잘 출력되는 모습을 확인할 수 있다.
⌨️ get 단일 조회 메서드
private final RestTemplate restTemplate;

@Override
@Retryable
public Dto.Response getPlayer(String name, String team) throws JsonProcessingException {

    UriComponentsBuilder uriComponentsBuilder = UriComponentsBuilder
            .fromHttpUrl("http://localhost:30000/players")
            .queryParam("name", name)
            .queryParam("team", team);

    ResponseEntity<String> responseEntity = restTemplate.exchange(uriComponentsBuilder.toUriString(), HttpMethod.GET,
                                                            null, String.class);

    String response = responseEntity.getBody();

    JsonNode jsonNode = JsonConverter.getJsonNode(response);
    String playerName = jsonNode.get("name").asText();
    String scoutStatus = jsonNode.get("scoutStatus").asText();
    String playerTeam = jsonNode.get("team").asText();
    int overall = jsonNode.get("overall").asInt();

    return Dto.Response.builder()
                       .name(playerName)
                       .scoutStatus(scoutStatus)
                       .team(playerTeam)
                       .overall(overall)
                       .build();
}- UriComponentsBuilder 객체를 사용하여 queryParameter를 설정하고 toUriString() 메서드를 사용하여 간편하게 쿼리 파라미터가 포함된 url을 파라미터에 넣을 수 있다.
⌨️ get 단일 조회, Spring Retry 테스트
UriComponentsBuilder uriComponentsBuilder = UriComponentsBuilder
        .fromHttpUrl("http://localhost:30000/players")
        .queryParam("name", "messi")
.queryParam("team", "miami");- 일부러 데이터베이스에 없는 선수의 이름을 입력하여 요청을 보냈다.
- 아까 configuration에서 @Retryable(value = RestClientException.class, maxAttempts = 2, backoff = @Backoff(delay = 1000)) 애너테이션을 오버라이딩 된 exchange 메서드에 붙였기 때문에 @Retryable 메서드가 붙은 경우 정상적인 통신 실패 시 1초 딜레이 후 한 번 더 재시도하게 될 것이다.
❌ 실패 postman

- 스카우트 리스트에 messi는 없으므로 실패한다.
❌ 실패 log

- 로그를 확인해 보니 Spring Retry에 의해 두 번 요청하고 끝냈음을 확인할 수 있었다.
🔵 성공 postman

- 파라미터 값을 정상적으로 넣으면 테스트가 성공한다.
🔵 성공 log

- 성공 log도 깔끔하게 나온다.
📜 정리
- 이밖에도 restTemplate를 이용하여 보다 정교하고 깔끔한 코드를 만들 수 있는 방법은 많이 있는 것 같다. 찾아보자.
- 처음으로 외부 api 서버와의 통신을 구현하게 된다면 어느 정도의 학습이 필요하겠지만 누구나 충분히 쉽게 할 수 있는 수준이다.
- 실제로 프로젝트에서 사용하면서 구현 자체보다 까다롭다고 느낀 것은 여러 번의 connection reset이 나는 상황에서 spring retry를 몰라 재연결 로직을 쓸데없이 어렵게 만들었던 과정과, 복잡한 Json 데이터를 받았을 때 기존에는 dto만 만들면 알아서 값이 채워졌는데 이를 일일이 파싱해야 했던 부분 등이었다. 그래도 그리 어려운 내용은 아니라 조금의 삽질로 쉽게 극복할 수 있었다. 끗!
참고
https://taetaetae.github.io/2020/03/22/better-rest-template-1-retryable/
https://minkwon4.tistory.com/216
https://mangkyu.tistory.com/256
뤼튼
728x90
'[Spring] > Spring 기본' 카테고리의 다른 글
| Spring Boot에서 외부 API 서버와 통신하는 기술에 대해 알아보자 (0) | 2023.08.27 |
|---|---|
| @Valid & @Validated 차이점에 대해 알아보자.(JSR 380 정리) (0) | 2023.06.07 |
| 빈 스코프 (0) | 2023.03.07 |
| 빈 생명주기 콜백 (0) | 2023.03.06 |
| 자동 빈 등록과 수동 빈 등록을 사용하는 기준 (0) | 2023.03.06 |